Row-level Security (RLS) in Power BI
What is Row-Level Security?
Row-level security (RLS) is the ability to restrict data for given users within Power BI. Row-level security (RLS) works by creating roles and selecting what data they can see, then assigned specific users to these roles.
RLS is important to ensure that employees can only see data that they’re allowed to see.
How to Use RLS
In this article, we will be using an example situation to set up RLS for our report.
Example Situation
Fake Company opened 2 new restaurants at the beginning of 2020 in New York and Los Angeles. Now, the board of directors want to see the continual growth of these restaurants on a region basis. Their main requirement, add an element of row-level security so only employees of each region can see their region. E.g. Employees from region East can only see region East numbers.
Getting Started
- In Power BI, head to the ‘Modelling’ tab and select ‘Manage roles’ within the ‘Security’ group.

2- The ‘Manage roles’ window should pop up.
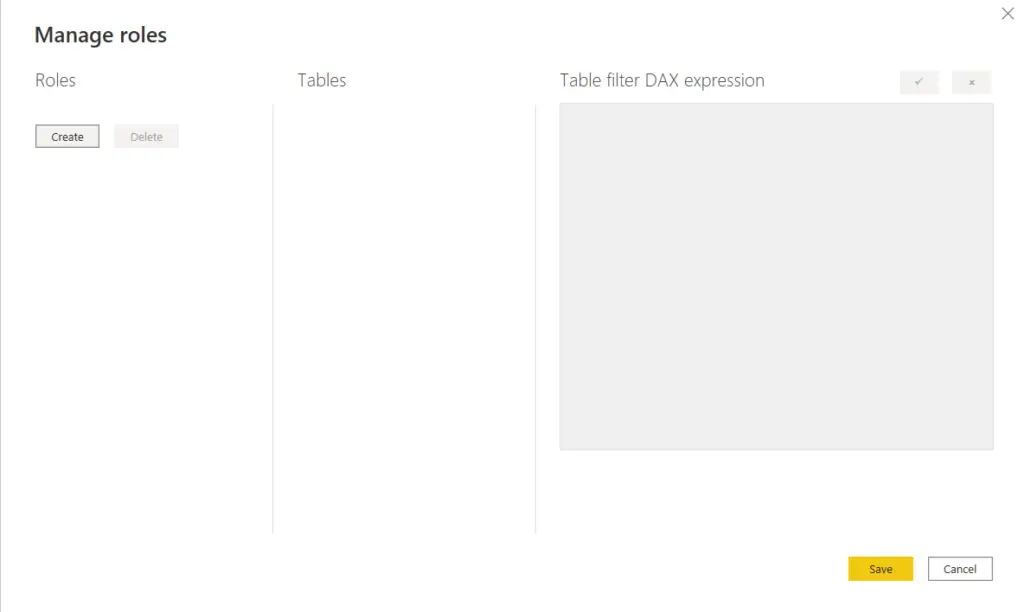
3- Click ‘Create’ and for this article, we will create 2 roles. Name your roles ‘East’ and ‘West’.
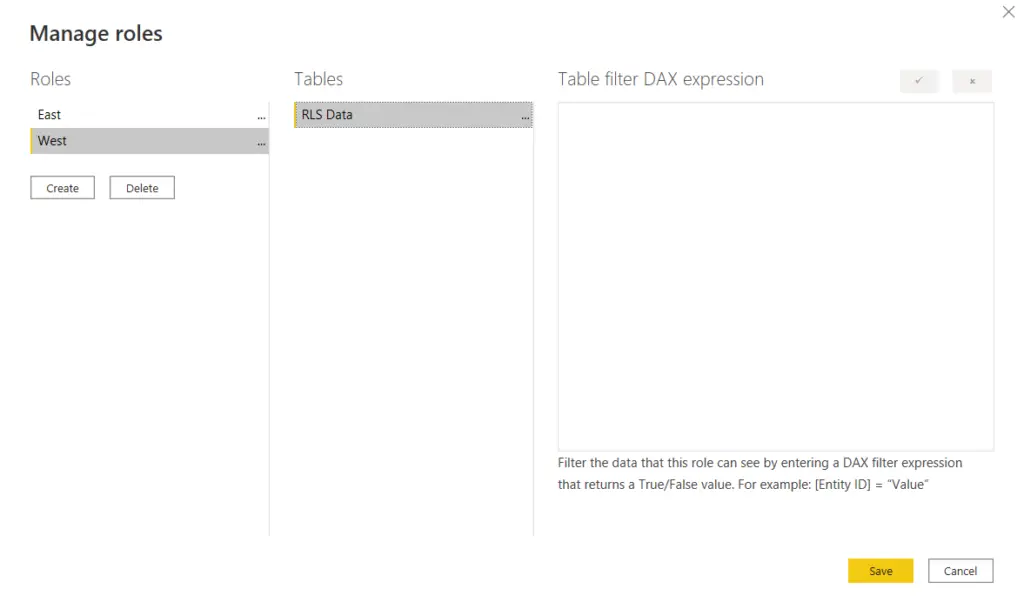
4- In the ‘Tables’ column, click the ‘…’ > Filter > [Region]. This will allow us to create a DAX filter expression on the ‘Region’ column which will return True/False.
5- In the ‘Table filter DAX expression’ column, ensure it shows as [Region] = “East”.
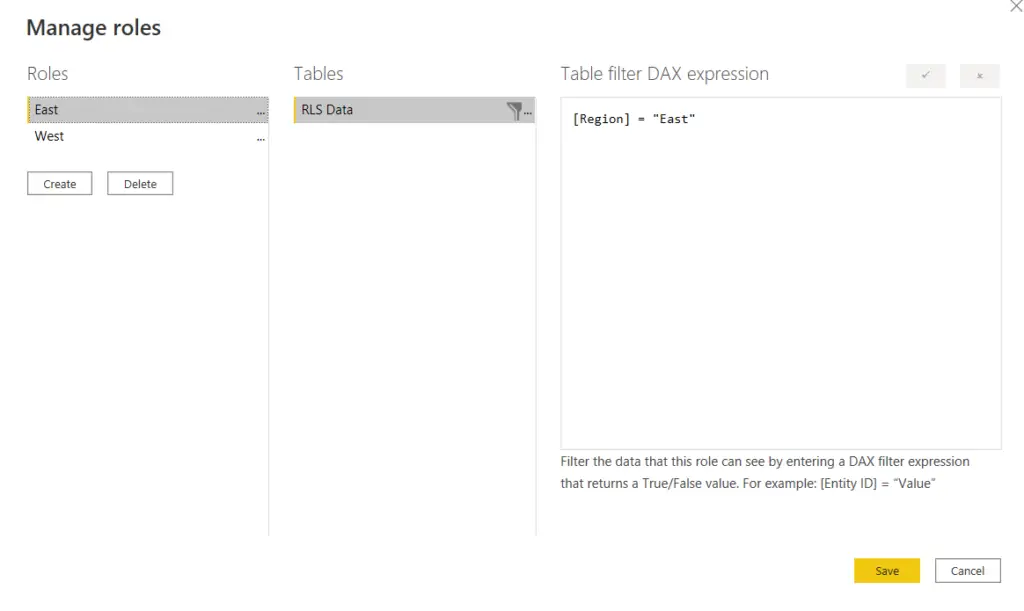
6- Once you have done the previous step for the East region, make sure you repeat the step for the West region.
7- You should now have 2 regions set up, East and West.
8- Click ‘Save’ to exit the window.
Testing The Roles
Now that we have created the East and West roles, how do we make sure that they are working how we expect? It is always ideal to test all roles after you have created them, so you can make sure they are working as expected and you can fix any issues that arise.
Testing the roles can be done by following the below steps:
- Go to the ‘Modelling’ tab and select ‘View as’ in the security option

2- Select the ‘East’ role.
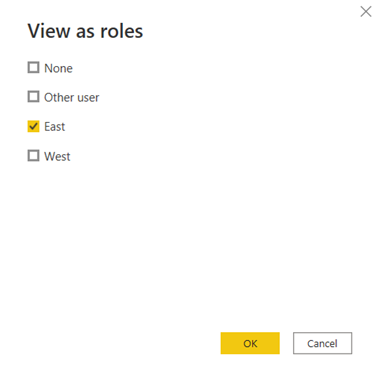
3- Once you click ‘OK’, you will see the graph change to just show the East revenue.
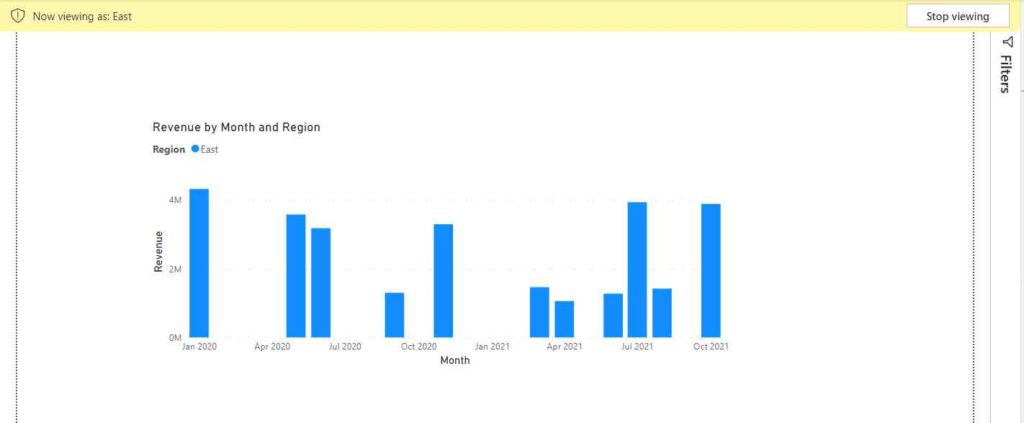
Notice how the graph changes to just the East revenue? Because the graph has changed to this, we now know that our roles are working correctly. You will also notice the notification at the top, ‘Now viewing as: East’, this is just to tell you what role you are currently viewing the data as.
If you switch the role to West, you will see that the graph changes once again and will show only the West revenue.
Adding Users to Roles
Now that we have created our roles, let’s learn how to add users to them.
- Save and publish the Power BI report to a Power BI Workspace.
- Navigate to the Power BI Workspace.
- On the dataset (in Orange) → Select the vertical ellipses (…) (‘More Options’) → select “Security’
- Add users to the role (West/East) you established → select ‘Save’.
- Select the vertical ellipses (…) next to the security group (‘More options) → select ‘Test as role’ → ensure that the RLS is working as expected.
Finishing Off
In this article, you have learned what RLS is, how to create roles, how to test the roles, and how to add users to roles. RLS is an extremely powerful and useful piece of functionality within Power BI that allows to protect data and only show it to specific people.
For more useful blogs, please visit Learn DAX